Getting Started
Our FULL-SIZE, "Trace & Create" Patterns make it easy to get started in the fun hobby of woodcrafting. Prior experience is optional--even beginners find our patterns so easy to use they're soon turning plain wood into their own unique handcrafted items.
Truly, woodcrafting using Winfield Collection patterns can be as simple as following these three steps...
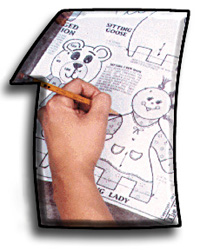
Step #1
Place a sheet of Pattern Transfer Paper (available on our website) onto the size and thickness of wood noted on the pattern. Lay the pattern sheet down locating your design close to the edge of the wood. Transfer the full-size pattern lines for all project pieces onto the wood by tracing the pattern using a pen, pencil or stylus.
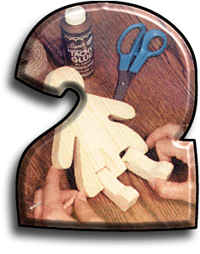
Step #2
Cut out all the wood pieces along the traced lines using a saw appropriate for the project (a coping saw, scroll saw, band saw or jigsaw could be used for this project). Drill any holes required and lightly sand if necessary. Now assemble the project following the step-by-step instructions and assembly diagrams included on our patterns.
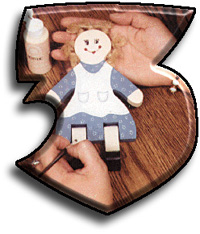
Step #3
Finish the project as noted in the pattern instructions. Painted projects such as this one have the paint colors called out for all areas and lines. This makes painting your project as easy as "paint by number" and ensures your project will look exactly like ours when you're finished.
We hope the simple example above demonstrates how fun and easy woodcrafting with Winfield Collection patterns can be. It's so easy, in fact, that your whole family can get involved and enjoy the entire creative process together.
The hardest part just might be choosing your next projects from the incredible selection available on our website!